Sunday, 14 October 2012

Dividing the frame - Balance


This exercise shows how balance in our previous pictures was achieved by placing the main subject in the frame.

Most of our subject were placed off the centre of our photographs what made it easy to identify balance. In previous exercise we were placing object to a different positions in frame so we could see how balance or unbalance can make the picture look pleasant or unpleasant. 

In this picture, the main point of interest is the larger house on top of the frame,
where the hanging items lead our attention towards it


The balance was achieved by placing the focused area close to the side of the picture

The main object is placed little bit off the centre of frame
where the other object lead our sight towards it

This picture looks very unbalanced and unpleasant because of all the misleading objects in the picture

Main subject is placed slightly off the centre of the frame. We could place it more to the left to make it more balanced

This object was carefully placed in the middle of frame which makes it look very static and boring

Tuesday, 9 October 2012

Focal lengths and different view points


On this exercise we simply demonstrate how the background will change (will be compressed) when we change focal length.

Both pictures were taken from different spot but our subject to background distance did not change. For the first picture we were closer to our subject and we used wide focal length. The second picture was taken from distance by using telephoto lens. As we can see our subject is the same size in both pictures. The only thing that changed is the background. In the wide focal length picture it is less compressed than when we used telephoto. 

200 mm

17 mm

Focal lengths - variable focal lengths


Here we demonstrate how the look of picture will change by using a different focal length.
All pictures were taken by different focal length from the same spot. 
  

17 mm

55 mm

200 mm

Thursday, 20 September 2012

Looking through the viewfinder - A sequence of composition


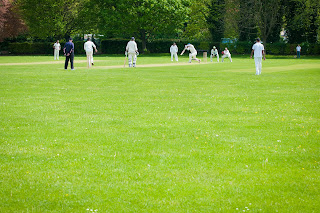
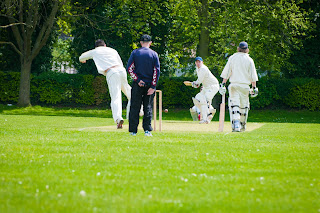
This exercise is applying all the previously learned rules about composition. I decided to document a cricket game. 

As I approached the playground I used the rule of thirds. I framed the players in the top so there was as less as possible of distraction from trees and houses in the background.

I have chosen fast shutter speed to freeze movement.

I framed the main character little off centre and made sure there are other people placed in different distance to see the depth of the playground.

I have tried to freeze fast action.

I used the panning technique to keep the moving object sharp and motion blur those static ones.


Looking through the viewfinder - Object in different position in the frame


On this exercise we shoot couple of pictures where the object is placed on clean background. Just by the different position of the object in the frame all composition and feeling changes.

The first picture was taken just point and shoot. The object ended in the middle and this composition is not very pleasing. The object is lost in the background and is not  very appealing to the eye.

In others pictures the composition was changed and they are ordered so that the last picture is most pleasing to the eye.   


Tuesday, 19 June 2012

Looking through the viewfinder - Fitting the frame to the subject

For this exercise I have chosen a bench in my garden. Dimensions of this subject are horizontal, so I have chosen a horizontal framing. The first picture is a conventional view point.


In the second picture the subject is shot to fit and fully fill the frame.
In the third picture I chose an interesting detail which is in focus and the rest of the bench is beyond the frame.
In the last picture the subject is gently arranged into surrounding environment so that it is pleasing for eyes.
I did few crops of the last picture to see how differently it looks with different crops.


Saturday, 12 May 2012

Photographing movement - Panning with different shutter speed


This exercise beautifully shows what everything can be achieved by a proper use of different shutter speeds. By using panning technique I could freeze dynamic moment with preserving both sharpness and dynamic at the same moment.

I used different shutter speeds to show all varieties of looks that can be achieved.

I wanted to preserve the same aperture over all images so the only changing values were shutter speed and iso to compensate proper exposure.  In longer shutter speeds I had to use polarised filter (which added +1.3 stops) to achieve slower shutter speed. 

I started on 1/1000th of second and finished on 1/15th of second. The difference between them was significant. As the shutter speed slowed down the background started to get more and more blurry with a beautiful MOTION blur effect caused by camera movement. But the object itself was sharp.

I love this creative technique because it enhances background movement while the sharpness of object is preserved. It helps the object to pop out of picture to make it look more significant.

1/1000

1/800

1/500

1/320

1/200

1/125

1/80

1/50

1/20

1/10

Some more pictures of the same exercise but different object

1/1000

1/800

1/500

1/320

1/160

1/80

1/50

1/40

1/15